


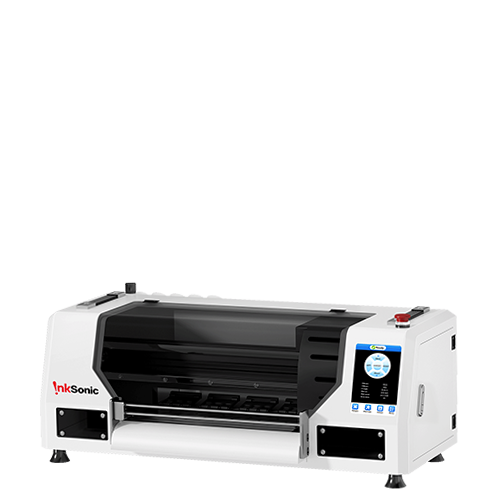


A first-time DTF setup should take you from an unopened machine to a repeatable test transfer, not just to a printer that powers on. The process includes preparing the workspace, loading ink and film, connecting the printer and RIP software, calibrating print and feed settings, and validating the full transfer workflow before customer production.
The exact sequence varies by machine, so follow the manufacturer's instructions for ink charging, shipping-lock removal, printhead preparation, firmware, and maintenance whenever they differ from the steps below. Use this guide as a practical framework, then match each step to your printer, consumables, and finishing equipment.
What Do You Need to Set Up a DTF Printer?
Have the full workflow ready before adding ink. A missing cable, RIP license, powder, or curing device can leave the printer sitting idle halfway through setup while ink is already in the system.
Item |
Why You Need It |
DTF printer and power/data cables |
Core printing hardware and required connections |
DTF ink |
CMYK plus white ink specified for the machine |
DTF PET film |
Printable carrier film compatible with the printer and ink |
Hot-melt adhesive powder |
Bonds the printed transfer to the garment |
Powder shaker / curing oven or manual curing setup |
Applies and cures adhesive after printing |
Heat press |
Transfers the finished design to the garment |
Computer and RIP software |
Controls print modes, white ink, mirroring, sizing, and color workflow |
Cleaning and maintenance supplies |
Supports nozzle, capping-station, wiper, and spill cleanup |
Test garments |
Lets you validate the process before customer work |
Before You Start: Prepare Your DTF Printing Workspace
A stable workspace makes setup easier and reduces variables when something does not print correctly. The printer, powder system, curing equipment, and heat press should be arranged so film can move through the process without being dragged across dirty surfaces or repeatedly carried across the room.
Setup Area |
What to Check |
Space |
Leave enough clearance to load film, access service areas, open covers, and handle printed transfers. |
Level surface |
Use a rigid, stable stand or table that keeps the printer level and limits vibration. |
Temperature and humidity |
Keep the room within the operating range specified by the printer and ink supplier; avoid rapid swings, direct HVAC airflow, and very dry conditions. |
Ventilation |
Provide appropriate ventilation for curing fumes and follow the safety guidance for your ink, powder, and curing equipment. |
Electrical setup |
Use the voltage, outlet, grounding, and circuit requirements specified for the printer and finishing equipment. |
Computer / network |
Place the RIP computer close enough for reliable USB or network communication and disable avoidable sleep or disconnect behavior during setup. |
Workflow arrangement |
Plan a clean path from printing to powdering, curing, cutting, pressing, and inspection. |
Step 1: Unpack, Inspect, and Position the DTF Printer
Remove Shipping Locks and Protective Materials
Follow the unpacking sequence in the manual and remove the shipping locks, transport brackets, foam inserts, carriage restraints, and protective strips it identifies. Do not force the carriage, printhead assembly, or ink system. Keep unfamiliar transport parts until the manual confirms they are no longer needed.
Check the Printer and Ink System for Shipping Damage
Before adding ink, inspect the printer for loose connectors, cracked ink lines, damaged dampers, leaking bottles, bent brackets, or impact marks. Confirm that film rollers, take-up hardware, pumps, caps, and the waste system are seated correctly. Photograph visible shipping damage before continuing if you may need dealer support.
Place the Printer on a Stable, Level Surface
Position the machine where you can reach the maintenance area without moving it later. A printer that rocks, tilts, or sits partly unsupported can create feed and ink-delivery problems that are difficult to diagnose during calibration.
Connect Power and Data as Directed by the Manufacturer
Connect only the required power, USB, Ethernet, or accessory cables at this stage. Follow the startup order in the manual, since some machines require software installation before the data connection while others use a different sequence.
Step 2: Install the DTF Ink and Prepare the Ink System
Load CMYK and White Ink
Confirm each bottle, tank, or cartridge position before filling. Shake or mix white ink only as directed by the ink supplier, and avoid contaminating one channel with another. If the printer shipped with storage or shipping fluid in the ink path, do not add production ink until the setup procedure explains whether that fluid should remain or be removed.
Complete the Initial Ink-Charging / Priming Procedure
Initial charging differs by model. Some systems prime automatically, while others require controlled filling, damper checks, or a service routine. Do not use aggressive syringe pulls or repeated cleanings simply because ink has not reached the printhead immediately. Follow the approved startup procedure and stop if you see air leaks, dampers that will not fill, or ink where it should not be.
Start or Verify the White Ink Management System
Once ink is loaded, confirm that the white-ink circulation or agitation system is operating correctly. White ink settles more readily than CMYK, so a full tank does not mean the system is ready. Verify any scheduled circulation or automatic-cleaning functions before leaving the printer idle.
Step 3: Load and Align the DTF Film
Identify the printable side of the PET film before loading it. If the sides are difficult to distinguish, use the film supplier's instructions rather than guessing. Mount the roll in the correct direction, center it on the feed path, and make sure guides are snug without pinching the media.
Feed a short section through the printer and watch how it tracks before sending artwork. The film should move straight without wrinkling, drifting sideways, or pulling too tightly against a guide. On roll-fed systems, set take-up and tension only as required for smooth movement; excessive tension can create feed errors just as easily as loose film can.
Step 4: Install the Driver and Configure the RIP Software
Connect the Printer
Install the required driver or communication utility, then confirm that the computer can see the correct printer. If the system uses Ethernet, record the working network settings before changing anything else so connection problems are easier to isolate later.
Add the Correct Printer Configuration
Select the exact printer model, print width, head configuration, and ink-channel layout in the RIP. A generic preset may print an image while still sending the wrong white-ink behavior, media width, or pass settings.
Load the Correct ICC / Ink Profile
Use a profile intended for the printer, ink set, film, and print mode whenever one is supplied. The goal at setup is repeatable output, not immediate manual color correction. Start from the recommended profile before changing ink limits or curves.
Configure White Ink and Print Mode
Confirm the white underbase settings, color-channel configuration, pass mode, and any required choke or spread settings. Test print quality at a known mode first; changing several variables at once makes registration or density problems harder to trace.
Confirm Mirror Printing and Artwork Size
DTF artwork is normally printed mirrored because the image is transferred face-down onto the garment. Verify the final dimensions in the RIP, then preview the job before printing so a scaling or orientation error does not become your first diagnostic problem.
Step 5: Run a Nozzle Check and Calibrate the Printer
Run the First Nozzle Check
Print a nozzle check before a full image. Look for complete CMYK and white patterns with no missing sections, deflection, or obvious cross-contamination. If the pattern is incomplete, use the normal recovery routine for your machine before moving into calibration.
Align the Printheads
Complete the required head alignment so bidirectional passes and multiple heads place ink in the same position. A printer can produce an attractive small image while still showing edge doubling or softness on larger artwork if alignment is skipped.
Align the CMYK and White Layers
Check that the white underbase sits behind the color rather than creating a visible halo. White/color misregistration is especially easy to see around text, thin outlines, and small high-contrast graphics, so use a test file that includes those elements.
Calibrate Film Feed
Adjust feed only after confirming the nozzles and head alignment. Repeating horizontal light or dark bands can come from feed error, but similar defects can also come from missing nozzles or an unsuitable print mode. Change one variable at a time and reprint the same test pattern.
Step 6: Make Your First DTF Test Print
Use a small test file that includes solid color, fine detail, text, gradients, and areas with a clear white underbase. This gives you more useful information than printing a simple logo that hides registration or density problems.
Check |
What a Good Test Should Show |
Nozzles |
No recurring missing lines or channel dropouts |
Banding |
Smooth fills without repeating horizontal light/dark bands |
Color |
Consistent output without obvious color shifts for the selected profile |
White density |
Opaque, even white without excessive pooling |
Registration |
White layer aligned behind CMYK with no obvious halo |
Film feeding |
Straight tracking with no wrinkles or skew |
Detail |
Small text and edges remain clean at the chosen mode |
Step 7: Apply Powder and Cure the First Transfer
Apply Hot-Melt Powder Evenly
Cover the wet printed area with the specified DTF powder, then remove the excess so adhesive remains where ink was printed rather than across the clear film. An uneven coat can create weak edges, heavy texture, or stray adhesive around the design.
Safety note:Handle DTF adhesive powder according to the supplier’s SDS and local safety guidance. Minimize airborne dust, use the recommended ventilation and protective equipment, and keep loose powder away from food and general work surfaces.
Cure According to the Consumable and Equipment Requirements
Curing settings depend on the powder, ink, film, and curing equipment. Use the recommended settings for that consumable and equipment combination rather than one universal temperature-and-time value. Whether you use a shaker/dryer, curing oven, or approved manual setup, the goal is to melt and set the adhesive without scorching the film or overcuring the transfer.
Check Whether the Transfer Is Properly Cured
Inspect the adhesive before pressing. It should look evenly fused across the printed area without obvious loose powder, wet-looking sections, burned spots, or severe film distortion. If the result is inconsistent, correct the curing stage before using the transfer to judge printer quality.
Step 8: Make Your First DTF Transfer
Prepare the Garment
Use a clean test garment and pre-press only if the transfer or garment workflow calls for it. Keep seams, zippers, and thick construction away from the pressing area so the platen can apply even pressure.
Set the Heat Press for the Specific Transfer
Use the time, temperature, and pressure recommended for the film, powder, and garment combination. DTF transfers are not all pressed at one universal setting, and peel timing can also vary by film.
Press and Peel
Position the transfer, press it, then peel at the time specified for the film. Watch the edges and fine details. If the film resists or part of the image lifts, stop and check the press, cure, and peel conditions before trying again.
Complete a Final Press if Required
Some workflows use a short second press with a protective sheet to finish the surface and reinforce the transfer. Treat this as part of the specific transfer recipe rather than an automatic step for every material.
How to Check Whether Your DTF Setup Is Ready for Production
One successful transfer is not enough to prove that the setup is stable. Run the same or similar test more than once and confirm that the result can be repeated without new nozzle loss, feed drift, white misregistration, or curing changes.
Production-Ready Check |
Pass Condition |
Nozzle check |
Clean and repeatable |
White / color alignment |
No visible halo or offset |
Film feeding |
Tracks straight through repeated prints |
Color |
Acceptable and repeatable for the selected profile |
Powder application |
Even coverage with minimal stray adhesive |
Curing |
Consistent across the full transfer |
Transfer result |
Complete adhesion with clean edges and expected feel |
Repeatability |
More than one test succeeds under the same settings |
Move on to customer orders only after you can repeat the same result more than once. Save the working RIP preset, curing settings, heat-press recipe, and any machine-specific notes so the setup can be reproduced after maintenance or a material change.
First-Time DTF Setup Problems and What to Check
Problem |
Check First |
Printer powers on but will not communicate |
Driver, USB/Ethernet connection, IP settings, RIP port, sleep/firewall behavior |
Missing nozzles after ink loading |
Correct priming procedure, ink supply, dampers/lines, cap seal, manufacturer cleaning routine |
White ink does not print correctly |
White channel mapping in RIP, circulation/agitation, ink supply, nozzle condition |
White outline is offset from color |
Head alignment and white-layer registration settings |
Horizontal banding |
Nozzle check first, then feed calibration and print mode |
Film walks sideways or wrinkles |
Roll alignment, guides, take-up, tension, feed path |
Powder does not stick evenly |
Wet ink coverage, powder type, application method, contamination |
Transfer peels or lifts |
Cure quality, press pressure, time/temperature, peel timing, garment surface |
Color is unexpected |
Correct ICC/profile, ink set, RIP mode, artwork color setup before manual correction |
Avoid changing several settings at once. Start with the stage where the defect first appears, confirm the basic mechanical or software condition, make one controlled change, and print the same test again. If a setup step requires service-mode access, head removal, or aggressive ink-system intervention, use dealer or manufacturer support instead of improvising.
DTF Printer Setup FAQs
How Long Does First-Time DTF Printer Setup Take?
Plan for more than the time needed to unpack the printer. Ink charging, software installation, alignment, feed calibration, curing checks, and repeated transfer tests can make first-time setup a several-hour process, and unfamiliar systems may take longer. It is better to reserve enough time to troubleshoot than to schedule customer orders for the same day.
Do You Need RIP Software to Set Up a DTF Printer?
In most DTF workflows, yes. The RIP controls functions that a standard desktop print driver usually does not handle well, including white-ink layers, ink density, mirroring, pass modes, nesting, and printer-specific color profiles. Use the RIP and configuration intended for your machine.
Should You Print Immediately After Filling a DTF Printer With Ink?
Do not move straight to customer artwork. Complete the printer's ink-charging or priming process, verify the white-ink system, run a nozzle check, and finish the required calibration first. The correct waiting or charging sequence depends on the machine and ink system.
What Temperature and Humidity Should a DTF Printer Room Have?
Keep the room within the operating range listed for the printer and ink. Consistency matters more than chasing one universal number: avoid very dry air, condensation, strong drafts, direct sunlight, and rapid temperature or humidity changes around the printer and film.
What Should You Do After the First DTF Printer Setup?
Save the working RIP settings, document the film, powder, cure, press, and peel conditions, and establish a daily and idle-time maintenance routine for the machine. Run regular nozzle checks and keep a known-good test file so you can compare output after cleaning, software changes, or consumable changes.


