




An acrylic sign making machine can be as simple as one printer, or it can be part of a small production line. If you buy pre-cut blanks, the main job is adding the design. Starting with raw acrylic sheet means you also need a way to cut the panel and finish it before the sign is ready to sell. That difference matters more than the size of the shop.
Choose the equipment around the finished sign. Full-color graphics point to a UV flatbed. A CO2 laser handles cutting and engraving, while a CNC router is better for larger fabrication. If the artwork will be applied rather than printed directly, vinyl or UV DTF may be the simpler route.
Which Machine Do You Need for Different Acrylic Signs?
Acrylic Sign Job |
Main Machine |
Why |
Full-color acrylic signs |
UV flatbed |
Direct printing |
Clear acrylic |
UV flatbed + white ink |
Opacity / reverse print |
Custom-shaped printed signs |
CO2 laser + UV printer |
Cut + print |
Engraved signs |
CO2 laser |
Cut / engrave |
Large fabricated signs |
CNC + UV printer if needed |
Fabricate + print |
Vinyl graphics |
Printer + cutter |
Applied graphics |
Small transferred graphics |
UV DTF |
Transfer to pre-cut items |
Use the table to match the job to the main acrylic sign making equipment first. Then check the machine against the sign sizes you actually sell. A setup that works well for 8 x 10-inch plaques can become awkward if most orders are 24-inch panels that need repositioning.
UV Flatbed Printers for Printing Acrylic Signs
A UV flatbed printer is the most direct option when the sign mainly needs full-color graphics. The panel stays on the bed while the ink is printed and cured, so direct printing on acrylic does not require a separate transfer or mounting step.A compatible acrylic printer can work with clear, colored, or frosted acrylic and can also handle products such as plaques and wall signs. Pay close attention to the usable print area rather than the outside dimensions of the machine. Thin panels need to stay flat during printing, and thicker blanks need enough printhead clearance to pass safely under the carriage.
For UV printing on acrylic, test adhesion on the exact stock you plan to use. Acrylic from different suppliers can have different coatings or surface treatments, so the same print settings may not behave the same way. Remove the protective film, clean a small sample, print it, and check the surface after curing. If the ink scratches or lifts too easily, follow the material or printer supplier's guidance on surface preparation or primer. Varnish can add gloss or texture, but it is an optional finish rather than a basic requirement. Do not assume more primer is better. Too much can change the surface gloss or leave a visible edge around the printed area, so use only the preparation the material actually needs.
White Ink and Reverse Printing on Clear Acrylic
Clear acrylic signs usually need a white layer when the design should look solid rather than translucent. A white underbase gives logos and lettering more density. You can also place white only behind selected parts of the artwork, leaving the rest of the panel transparent.
Reverse printing puts the image on the back of the panel so the viewer sees it through the acrylic. With this second-surface approach, the acrylic protects the printed surface from normal handling and can give the image extra depth. The artwork usually needs to be mirrored, and the color-white layer order must match the intended viewing side. Front printing is easier when you want the ink itself to remain part of the visible surface.
A UV printer for acrylic signs with white ink gives you more control when clear panels are a regular product. It lets you switch between opaque graphics and areas that stay transparent without changing the substrate.
UV Flatbed vs UV DTF for Acrylic Signs
A flatbed prints straight onto the object. UV DTF prints to transfer film first, then the finished graphic is applied to the surface. For full-color acrylic printing across a larger panel, direct flatbed printing is usually more efficient because there is no application step. UV DTF is more practical when the acrylic is already cut to size and only a smaller area needs decoration. It also helps when the object cannot be placed easily on a flatbed.
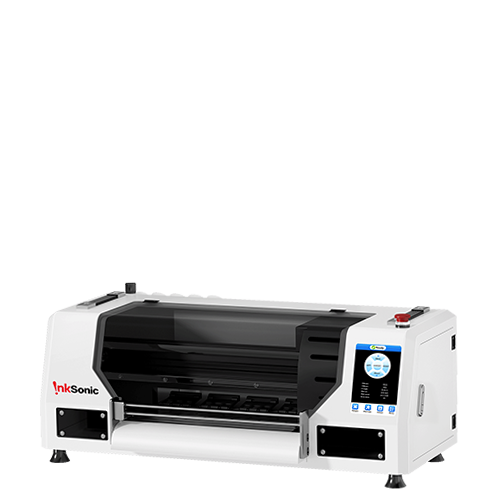
The InkSonic VF13 fits this smaller-transfer workflow. Its 11.8-inch A3 format combines printing and lamination, so it can be used for acrylic name signs, plaques, labels, and other compact hard-surface graphics. The blank still needs to fit the transfer width, and larger wall panels remain a better match for a flatbed. Treat the VF13 as a customization tool, not as a substitute for a full-size acrylic panel printer.

CO2 Laser Cutters for Acrylic Signs
A CO2 laser cutter becomes useful once you want to make the acrylic shape yourself. It can cut names, letters, custom outlines, mounting holes, and layered pieces from sheet material. This is especially helpful for repeat orders because the same file can control both the outer shape and the hole positions without marking each blank by hand.
The same machine can handle laser engraving acrylic for text, logos, or line art. That makes a laser cutter for acrylic signs a good fit for name signs, layered pieces, and acrylic wedding signs. If the finished look is mainly etched rather than printed, an acrylic engraving machine may be all the decoration equipment you need. Test engraving settings on scrap from the same sheet before using a finished blank, since acrylic type can change the result.
If your blanks arrive in the final shape and only need graphics, a laser may add little value. For transparent acrylic, CO2 systems are the standard choice because clear material absorbs their wavelength well. Most blue-light diode lasers struggle to cut clear acrylic reliably.
Cutting Is Only Part of Acrylic Fabrication
Custom-shaped acrylic signs still need some finishing after the cut. Edges may need cleanup or polishing, and mounting holes have to match the hardware you plan to use. Layered signs also need consistent alignment between pieces. Plan those details before cutting so you are not correcting them by hand after the graphics are finished. If the sign uses standoffs, test the hole size against the actual hardware before cutting a full batch. A small mismatch can turn into extra hand work at assembly.
CO2 Laser vs CNC Router
Factor |
CO2 Laser |
CNC Router |
Detailed shapes |
Strong |
Tool-dependent |
Engraving |
Strong for text / line art |
Possible with tooling |
Material thickness |
Best for typical sign acrylic |
Better for thicker stock |
Panel size |
Depends on laser bed |
Often better for large panels |
Tooling |
No cutting bit |
Bits and tool changes |
Edge finishing |
Often clean on acrylic |
May need more finishing |
Fabrication scale |
Small / custom work |
Larger fabrication |
A CNC router becomes more useful as the panels get larger or the material gets thicker. Mechanical cutting can also create routed pockets, slots, and mounting features that are less natural for a small laser workflow. The trade-off is that bit choice and workholding become part of the job, and the cut edge may need extra finishing. For repeat production, clamping and feed settings matter because movement during the cut can spoil the panel.
For detailed custom acrylic work, a CO2 laser is usually the simpler companion to a printer. Move toward CNC when the sign itself becomes a fabrication project rather than just a shaped panel. Add a UV printer only when that fabricated part also needs full-color graphics.
Can You Make Acrylic Signs With Printed Vinyl?
Yes. The basic workflow is design -> print vinyl -> contour cut -> apply to acrylic. Printed vinyl works well if the shop already uses an eco-solvent printer, latex printer, or print-and-cut system for other jobs. Keep the acrylic clean before application, and use simple registration marks when placement needs to be repeatable. Larger graphics may need application tape to keep the design aligned during mounting.
A vinyl cutter can handle simple lettering without involving a full-color printer. Vinyl also lets the same roll-media setup serve decals and acrylic signs, which can be useful when acrylic is only one part of the product mix. The downside is the application step: every graphic still has to be positioned on the panel by hand or with a registration method.Vinyl often makes sense when the shop already runs roll media every day. If acrylic panels become a frequent product, direct printing can remove enough handling to justify a dedicated flatbed. The decision is less about print quality than about how much time the application step adds to normal orders. Before buying another printer, time a few real jobs. If most of the labor is spent applying graphics rather than printing them, that is a stronger case for moving to direct print.
Which Acrylic Sign Workflow Fits Your Product?
Product |
Practical Workflow |
Clear wedding sign |
Pre-cut acrylic → reverse UV print + white |
Custom-shaped name sign |
Raw acrylic → CO2 laser cut → print / engrave |
Acrylic business sign |
Cut panel → UV print → drill / mount |
Large fabricated sign |
CNC fabrication → UV print if needed |
Small personalized plaque |
Pre-cut blank → UV DTF transfer |
Vinyl acrylic sign |
Print vinyl → contour cut → apply |
Start with the product you make most often. If you buy pre-cut blanks, an acrylic sign machine only needs to handle the decoration step. Raw sheets require cutting before printing or engraving, and larger business signs may also need drilling or mounting work after the graphics are complete. The largest regular order should set the minimum working area; a desktop machine is fine for plaques, but constant repositioning is a sign that the format is too small.
A small shop can start with one machine for acrylic signs when blanks arrive ready to decorate. Working from raw material usually creates separate printing and fabrication steps, so a second machine becomes useful only when one of those steps starts limiting what you can sell. Buy the next machine to remove a real production bottleneck, not simply to cover every possible process from day one.
FAQ
What printer do you need for acrylic signs?
For full-color work, a printer for acrylic signs is usually a UV flatbed because it can print directly on rigid panels. If you prefer applied graphics, a roll printer and cutter can also work. Match the printable area to the finished panel, and include white ink in the setup if clear acrylic is part of your regular product range.
Can you print directly onto acrylic?
Yes. An acrylic printing machine using UV-curable ink can print directly onto compatible acrylic. The important step is testing the actual material before production. Coatings and surface treatments can change adhesion, so a setting that works on one supplier's stock may not work equally well on another.
Do you need a laser cutter to make acrylic signs?
Not always. An acrylic sign printer can be enough when you buy blanks in the final shape. A laser becomes useful when you need custom outlines or engraving, or when mounting holes must be cut with the part. If those jobs are rare, ordering pre-cut blanks can be more efficient than maintaining another machine.
What kind of laser is used for acrylic signs?
A CO2 system is the usual machine for acrylic signs when clear acrylic needs to be cut or engraved. Typical blue diode lasers are less suitable because transparent acrylic does not absorb visible blue light well enough for reliable cutting.
Do you need white ink to print clear acrylic?
Not for every design. White ink is useful when transparent acrylic needs stronger color or readable text. On reverse-printed signs, the white layer usually sits behind the color. If parts of the design should remain transparent, apply white only where opacity is needed.


