




Most guides about starting a DTF printing business from home make it sound like a weekend project. Buy a printer, press some shirts, start collecting money. Not quite.
DTF printing is a genuinely strong option for a home-based side hustle, mostly because the workflow fits around a full-time job in ways that other printing methods don't. But "accessible" doesn't mean effortless, and the gap between owning a printer and actually making consistent money from it is where most people get stuck.
Everything below is based on the real first 30 days: what to buy, how to set up your space, what the money actually looks like, and where most beginners trip up.

What You Need and What It Costs
Let's start with the money, because vague ranges like "$2,000 to $10,000" don't help anyone make a real decision. A functional home DTF setup that can produce sellable product consistently runs between $2,000 and $4,000 all-in. Here's where that goes:
Item |
Estimated Cost |
Notes |
DTF printer (A3 format) |
$1,500 – $3,000 |
Core investment. Quality here pays off fast. |
Heat press (15×15 or 16×20) |
$300 – $500 |
Manual clamshell works fine to start. |
Powder shaker setup |
$0 – $150 |
Hand-shaking is workable at low volumes. |
Film, ink, powder (starter supply) |
$150 – $300 |
Enough for your first 100+ prints. |
Blank garments for testing |
$50 – $100 |
Buy a mix of cotton, polyester, and blends. |
RIP software |
Typically included |
Most reputable brands bundle this with the printer. |
The Printer
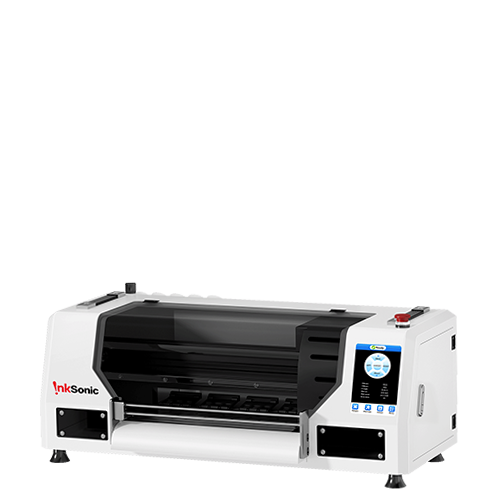
For side-hustle volumes, under 50 shirts a week, an A3-format printer with a 13-inch print width is the right starting point. It handles standard gang sheet layouts efficiently, fits in a spare bedroom or garage corner, and the running costs match a part-time operation.
Within the $1,500 to $3,000 range, there are solid options across different brands and configurations. Worth being direct about something: a printer at the $3,000 end of that range is not a budget machine. That's a well-built, production-capable piece of equipment that many full-time sellers use as their primary workhorse. You're not compromising at that price point.
When comparing models, look beyond the sticker price. Print consistency over time, how the white ink circulation system is designed, and what kind of after-sales support the brand actually provides — those are the things that shape your day-to-day experience. A responsive technical support team matters more than you'd expect, especially in the first few months when you're still learning how the machine behaves.
The Heat Press
A 15×15 manual clamshell does the job in the first few months. Once you're pressing 30 or more shirts in a single session, the repetitive clamping motion gets physically tiring and a swing-away starts making sense. That's a month-three upgrade decision, not a day-one purchase.
Powder Application
Shaking powder by hand and curing with a basic setup is unglamorous, but it works at low volumes. Combined shake-and-cure units run around $400 to $600 and represent a real workflow improvement once you're doing regular production. Save that investment for when you actually need it.
Monthly Ongoing Costs
Once you're operational, ongoing costs typically run $100 to $250 per month depending on output. Ink, film, and powder are the main recurring spend. At side-hustle volumes, it's manageable.

Setting Up Your Workspace
A spare bedroom, a corner of the garage, a section of a finished basement. All of these work. The space itself matters less than getting two things right.
Ventilation Is Not Optional
DTF printing works best in a space with some airflow. A window you can crack open with a small fan pushing air outward is the simplest setup. A wall-mounted or window exhaust fan is even better. If you're working in a garage, just keep the door partially open while printing.
Temperature and Humidity
This catches more new DTF owners off guard than almost anything else. The white ink system is sensitive to environmental conditions in a way that cotton and poly fabrics simply are not. The functional range is 68 to 77°F and 40 to 60% relative humidity.
Cold, dry conditions cause white ink to settle and clog faster. Running a printer in an unheated garage through a northern winter without any climate control means fighting ink problems on a weekly basis. A small space heater and a basic humidifier together cost around $50 and prevent hundreds of dollars in wasted ink and maintenance time. It's one of those purchases that seems unnecessary right up until the moment it becomes obvious.
Layout
Printer, then powder and curing area, then heat press, then finished goods. One direction of flow so you're not carrying wet film back across the room. A six-foot folding table for the printer, a second surface for the heat press, enough room to move between them. Compact, but completely functional. Plenty of people produce 30 to 40 shirts on a weekend in exactly this kind of setup.
Your First Month, Week by Week
Weeks 1 and 2: Learn the Machine Before You Think About Selling
The printer arrives. You've spent real money. Give yourself two weeks before taking any orders.
Start with test prints across different fabrics: cotton, polyester, 50/50 blends. Each one needs its own heat press settings. The temperature and time that work on a heavyweight Gildan will cause peeling on a poly blend, so treat each fabric as a separate calibration exercise. Write down every setting that works. You'll thank yourself later.
As the printing jobs are going on, begin creating your collection of designs. Pinterest is full of trends, colors, and unique ideas that you can screenshot and create in Canva. You do not have to worry about having Photoshop or Illustrator at first. Canva will take care of your basic text, graphics, and gang sheet designs.
Run wash tests on everything. Five cycles minimum per fabric type before you show a finished product to anyone. This isn't perfectionism. One batch of bad prints sold to ten people means ten refund conversations and a reputation hole that takes months to climb out of.
By the end of week two, you should have at least 10 successful prints across multiple fabrics, a set of confirmed heat press settings, a starter collection of designs ready to go, and zero guesswork left in your basic workflow.
Week 3: Build Presence Before You Have Orders
Before going after the customers, provide them with a place to find you and something to see.
Instagram and TikTok are the right options for this purpose. The content that works best in this case is not the highly polished pictures of products. It is the process. It is the transfer that comes out of the film. It is the reveal from the heat press. It is the comparison between the blank shirt and the final product. Watching the liner peel back, leaving behind the full color image on a black hoodie gives genuine satisfaction and does not require any artistic talent.
Do three to five posts before trying to sell anything. Appearing on an empty account and posting "DM to order" does not give you any reasons to be trusted.
Week 4: Land the First Real Orders
Start with people who already know you. Family, friends, coworkers, neighbors. Not because you need charity sales, but because these transactions have a lower cost of failure. You learn fulfillment, packaging, and communication without the pressure that comes with a stranger's expectations and a public review waiting on the other end.
Your neighbor's kid's baseball team needs jerseys. A coworker mentioned wanting matching shirts for a family reunion. Your aunt runs a small bakery and has been meaning to order branded aprons for two years. These aren't throwaway orders. They're your first portfolio pieces, your first word-of-mouth starting points, and proof that the operation works end to end.
Aim for 10 completed orders in month one. It's not a big number, but for someone starting from zero, finishing 10 real orders teaches you more about the actual business than any amount of preparation.
How to Get Your First 10 Customers
Your Immediate Network
Tell people what you're doing. Post on your personal social media. Text the group chat. Mention it to people at work. Not a sales pitch, just a quick "I started doing custom DTF printing, here's a shirt I just finished." People you know are more willing to support something you're building than most expect, and one mention turns into referrals faster than any paid ad would.
Local Demand
This is where home-based DTF sellers have a real edge. Youth sports leagues, school spirit wear, church groups, local businesses needing branded staff shirts. These customers exist everywhere, they reorder regularly, and they prefer buying locally when the option exists.
The best approach is simple: bring a finished sample. Don't send a price list. Walk in with a shirt. Also keep an eye on local Facebook groups and Nextdoor. When someone posts "does anyone know where I can get custom shirts made?" that's a ready-to-buy customer with almost no one competing for their attention.
Online Channels
Etsy is where most DTF sellers start, and for good reason. Built-in traffic, fast setup, and a customer base that already understands custom products. It's especially strong for selling pre-made transfers and gang sheets to hobbyists who own a heat press but not a printer.
But this is not the only choice. eBay is good for mass sales; Facebook Marketplace helps connect with the local buyers; and Amazon Handmade gives exposure to more people but is more difficult to get into. Use one or two platforms, find out where the orders are coming from, and then focus on that.

Real Profit Numbers
Here's the actual cost breakdown on a standard full-color chest print on a black Gildan tee:
Cost Item |
Per Shirt |
DTF ink |
~$0.30 |
Transfer film |
~$0.20 |
Adhesive powder |
~$0.10 |
Blank shirt |
~$3.00 – $3.50 |
Total material cost |
~$3.60 – $4.10 |
Custom printed shirts retail between $18 and $28 depending on design complexity and your market. At a $22 average, the material margin is roughly $18 per shirt.
What does that look like in practice? Twenty shirts on a weekend, around five to six hours of total work including printing, pressing, and packing, puts you at $360 in material margin for that session. A busier week, 10 shirts on weekday evenings plus 30 on the weekend, lands closer to $720.
For break-even on a $3,000 startup investment at the conservative 20-shirts-per-weekend pace, you're looking at roughly 8 to 10 weekend sessions, somewhere in the 2 to 3 month range.
One honest caveat: those numbers assume full-price sales, no failed prints, and no freebies. In the first few months, all three happen. Real break-even is probably closer to 3 to 4 months for most people. Still fast compared to most small business investments, but plan against the actual number, not the optimistic one.
The Mistakes That End DTF Side Hustles Early
Selling before testing. A customer doesn't care about the technical reason their print cracked after three washes. They know the shirt is ruined and they want a refund. Sell tested product only. No exceptions.
No niche, no identity. "Custom shirts" is a capability, not a business. "Custom team gear for youth sports leagues in your city" is a business. DTF sellers who build sustainable income in the first year almost always have a specific community or vertical they become known for. That focus makes marketing easier, referrals more natural, and pricing more defensible.
Neglecting the printer between orders. White ink settles when the machine sits idle. Leave it untouched for five or six days and you're accumulating a clog situation that gets more expensive the longer it's ignored. Run a short maintenance cycle every two to three days, check your nozzles, keep the white ink circulating. The cost of a neglected printhead is always higher than the cost of a weekly 10-minute routine. Build that habit from week one.
Competing on price from day one. Charging $10 per shirt to attract early customers sounds like a strategy. What it actually does is train your market to expect that price and attract buyers who won't stick around at $22. Price for what the work is worth, even when you're new.
When to Scale Up From Side Hustle to Full Operation
Somewhere between month four and month eight, the people who stick with it start running into a specific problem. Orders are consistent. Repeat customers keep coming back. The backlog stretches past two weeks. The printer runs every evening and the heat press is the bottleneck. That's the signal the business has validated itself. The constraint is no longer demand, it's capacity.
The typical upgrade path at that point is a wider-format printer for more efficient gang sheet layouts, an automatic powder shaker and curing system, and possibly a second heat press. That's a different investment level and a different conversation. What matters in months one through four is building the customer base and operational confidence that makes that future decision feel obvious rather than risky.

Final Thoughts
The gap between thinking about this and printing your first shirt is smaller than it feels. The equipment is more accessible than it was a few years ago, the learning curve is measured in weeks not months, and the demand for custom small-batch apparel keeps growing, especially at the local level where small operators have a real advantage over big fulfillment companies.
Still not sure which printer fits your budget, or what a realistic timeline looks like for your situation?


