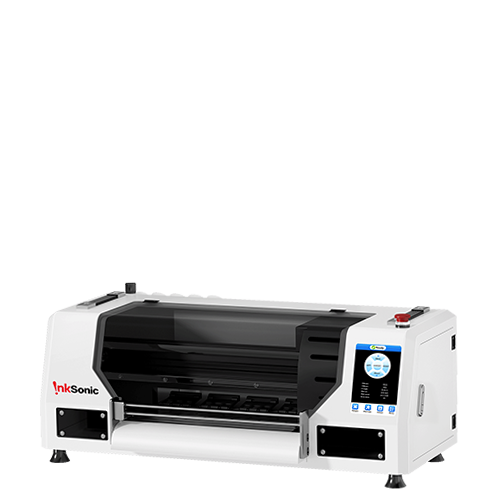
InkSonic is about to launch the new A3 UV DTF printer. If you want to learn more about our products, this article might help. We will provide detailed and accurate information with images and data to explain everything you need to know, and we hope it will be helpful to you.
1. UV DTF VS DTF And UV Printer
|
DTF |
UV DTF |
UV |
|
|
Consumables |
DTF powder, DTF ink, Powder shaker, Curing oven, Heat press machine |
AB film, UV ink |
UV Ink Or UV Ink +Varnish |
|
Compatible Surface |
Fabric |
Most Rigid Materials, Whether Regular or Irregular, Are Not Suitable for Fabric |
A flat or cylindrical material that can be fixed |
|
Workflow |
|
|
Directly print on the surface of the material. |
|
Application Scenarios |
Clothing, Textiles |
Glass products, ceramic items, metal products, phone cases, gift bags, and other personalized custom products. |
phone cases, glasses, etc. |
2. How the A3 UV DTF Printer VF13 Works
Step 1. Design UV DTF Decals
Beginner-Friendly RIP Software: Once installed, the software is easy to use, allowing you to adjust image sizes on a visual canvas. You can also take advantage of the automatic layout feature to optimize the print area and save costs.

Step 2. Install AB Film
Electric Heat Roller for Easy Film Alignment: The electrically adjustable heat roller design makes it easy to align and adjust the A and B films, eliminating the hassle of manually adjusting the laminating machine pressure. No need for a laminating machine anymore.
Step 3. Printing, Curing, and Laminating Process
Printing: After receiving and translating the printing job in Step 1, the electric rewinder automatically and evenly rolls up the protective film of Film A, while the UV DTF printer starts printing on the adhesive coating of Film A.
Curing: The UV ink contains light-sensitive curing agents, which are immediately cured when exposed to ultraviolet light from lamps on both sides of the printer.
Laminating: The laminating process is actually a transfer process. As Film A and Film B pass through the heat roller, they are pressed together. The ink and adhesive coating on Film A is transferred to Film B, giving it adhesive properties.
Step 4. UV DTF Sticker
Once cut, peel off Film B and apply uv DTF transfer film sticker to the item you want to customize.

Step 5. Paste UV DTF Sticker
The finished product has strong adhesion, and high durability, and is resistant to scratches, water, UV rays, and oil stains.
3. Additional Features Of The A3 UV DTF Printer VF13
3.1 Print Speed is Twice as Fast as XP600
The VF13 uses a single Epson DX7 printhead, achieving the print speed of two traditional XP600 printheads, while being easier to maintain. Most UV DTF printers on the market have 2-3 Epson XP600 printheads, each with 6 ink channels and 1080 nozzles. Our product features the DX7 printhead with 8 channels and 1440 nozzles, providing 360 more nozzles than a single XP600. Despite using just one DX7 printhead, the printing speed reaches 8ft²/h, and it avoids the hassle of calibrating multiple printheads. This allows you to achieve the same speed and quality with less maintenance effort.
3.2 Multi-Layer Color Printing
During normal printing, color ink and varnish are printed simultaneously. The instant varnish coverage effectively prevents issues like ink bleeding or edge blurring, while also providing brighter colors and a slightly embossed feel. This is all thanks to the Epson DX7 printhead.
In addition to the standard three-layer white, color, and varnish printing, we also offer a four-layer print mode with color ink + white ink + color ink + varnish. This allows you to see vibrant patterns on both sides of transparent materials like glass.
3.3 Printing and Laminating Combined
Traditional printers take up a lot of space because they require an additional laminating machine to complete the process. Without the laminating step, the result is only a semi-finished product (the UV DTF sticker consists of both A and B films; peeling off one layer allows for easy application).
Our VF13 cleverly combines printing and laminating into one. After printing on Film A, the ink is immediately cured by UV lamps and then transferred to Film B through the heat roller. This allows us to get a finished crystal-clear sticker directly, saving space and improving efficiency for your custom projects.
3.4 Quiet Design for Easy Integration into Home Spaces
The A3 UV DTF Printer VF13 features a sturdy base with four silent casters, making it easy to move and place the printer anywhere in your home. With only one printhead, the printer module is much smaller than other products on the market. We've optimized the overall size and arranged internal components more compactly, minimizing noise during printing, and ensuring it won't disturb your family members when used in home spaces.
3.5 High-Quality, High-Precision Structure
-
The high-precision vacuum platform ensures stable paper feeding and prevents edge curling, protecting the printhead from damage.
-
High-precision rails ensure smooth operation of the carriage, delivering high-quality results.
-
The anti-collision sensor responds promptly to rare unexpected situations, pausing the process to protect the printhead and minimize losses.

The siphon ink system ensures smooth and stable ink flow, effectively preventing nozzle splattering and ink supply issues.
3.6 Integrated Control Panel
The integrated control panel combines suction force adjustment, temperature control, white ink stirring timer, and automatic cleaning functions. This eliminates the need for complex buttons and knobs, reducing the back-and-forth operation between the printer and computer, providing a simple and efficient user experience.
3.7 UV Lamp Safety Shield
Due to the UV curing process, UV DTF ink is exposed to UV lamps. For user safety and to allow easy inspection of the printing process, we've redesigned the printer with a large transparent UV lamp shield. This shield provides a clear view of the printing process while protecting your eyes from UV exposure.
3.8 Side Maintenance Windows
The printer has simple side doors with safety switches. Simply slide the door latch, and the handle will pop out for easy access. We've designed some components on both sides of the printer, so if you encounter an issue, our after-sales engineers can quickly troubleshoot and resolve it. This also makes regular maintenance and care easier.
3.9 Appearance and Specifications
|
Product Size |
13.78 x 29.53 x 13.78 In |
|
Weight |
70.5 lbs |
Conclution
1. Lifetime Service & Support
- Lifetime customer care with 24/7 online service.
- Unlimited remote technical support and comprehensive warranty.
2. Innovative Features Coming Soon
- Upcoming built-in cutting knife with hidden blade design.
- Intelligent low ink alarm system for uninterrupted printing.
3. Stay Connected & Updated
- Join free membership for product updates and industry news.
- Stay informed about the latest innovations via email.


